Last Updated on April 4, 2026 by Sheila R. Wright
Stencil paper is a great way to make professional looking tattoos. To use stencil paper, first trace the design onto the paper using a pen or pencil. Then, cut out the design with scissors.
Next, apply the stencil to the skin and hold it in place with tape. Finally, use a tattoo gun to fill in the design.
- Cut out the design you want to use from the stencil paper
- Place the stencil on your skin and hold it in place
- Use a sharpie or other markers to trace the outline of the design onto your skin
- Remove the stencil and fill in the tattoo with whatever color you want
How to use Dowsabel stencil transfer paper for tattooing?
How to Use Tattoo Transfer Paper Without Thermal Copier
If you’re looking to get a new tattoo, you may be wondering how to use tattoo transfer paper without a thermal copier. While thermal copiers are the traditional way to transfer a tattoo design onto the skin, they’re not necessarily the only way. Here’s a step-by-step guide on how to use tattoo transfer paper without a thermal copier:
1. Start by sketching out your design on regular printer paper. You can also print out an existing design if you have one.
2. Next, place your tattoo transfer paper over top of the design and trace it with a pencil or pen.
Be sure to trace as accurately as possible so that your final tattoo looks just like the original design.
3. Once you’ve traced your design, carefully cut out the tattoo transfer paper along the lines that you traced earlier.
4. Now it’s time to apply the tattoo transfer paper to your skin!
Make sure that the area of skin where you’ll be applying the tattoo is clean and dry before proceeding. Gently peel off the backing of the tattoo transfer paper and apply it to your skin, pressing down firmly so that all areas make good contact with your skin surface.
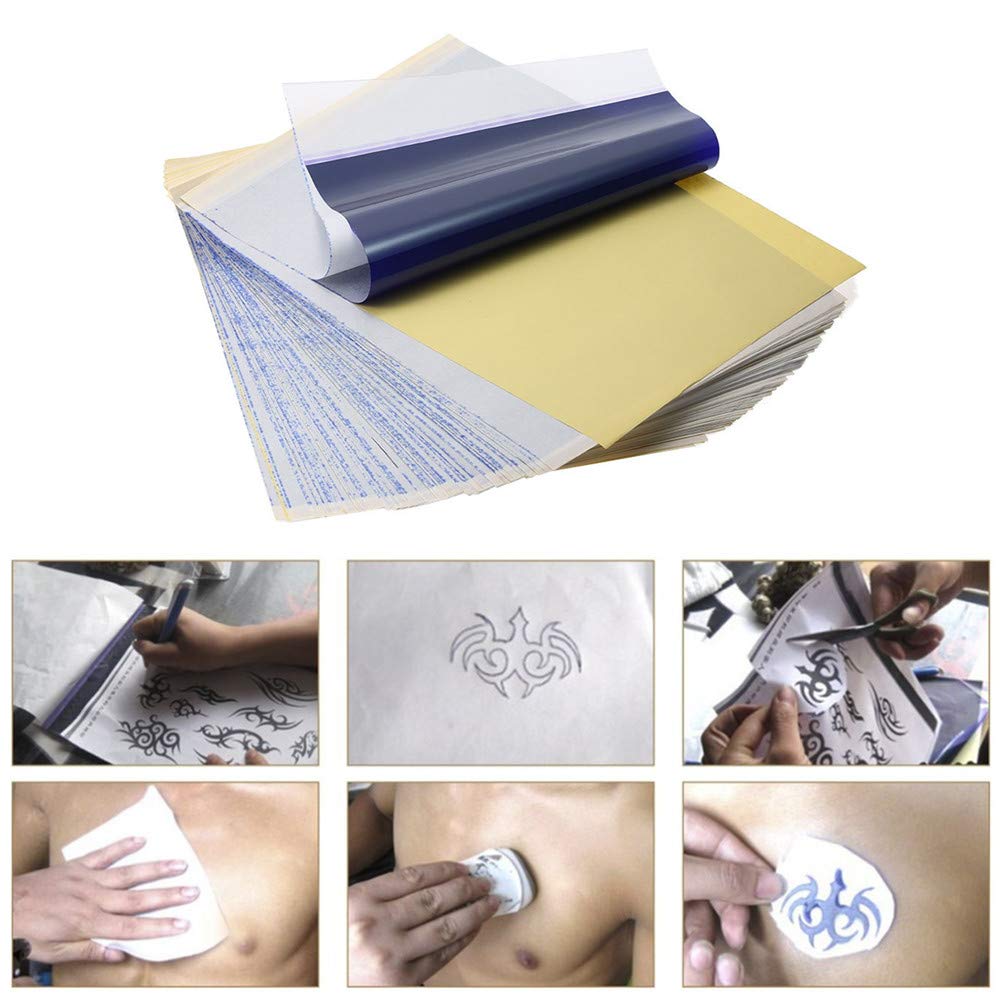
Credit: www.amazon.com
How Do You Use Paper As a Tattoo Stencil?
Assuming you would like a step-by-step guide on how to use paper as a tattoo stencil:
1. Begin by sketching your tattoo design onto a piece of paper. Use a pencil to lightly sketch the design onto the paper.
Doing this will help make the overall process easier and ensure that your tattoo turns out exactly how you want it too.
2. Once you have sketched out your tattoo design, use a sharp knife to cut out the stencil. Be sure to be precise with your cuts and take your time doing so.
The better the quality of your stencil, the better your tattoo will look in the end.
3. Next, apply some sort of adhesive to the back of the stencil. This will help ensure that it stays in place once you begin applying it to your skin.
4. Carefully apply the stencil to your skin, making sure that it is positioned correctly before proceeding further. Once you are happy with its placement, go ahead and trace over the lines of the stencil with a pen or marker. This will transfer the design onto your skin and act as a guideline for when you begin tattooing later on.
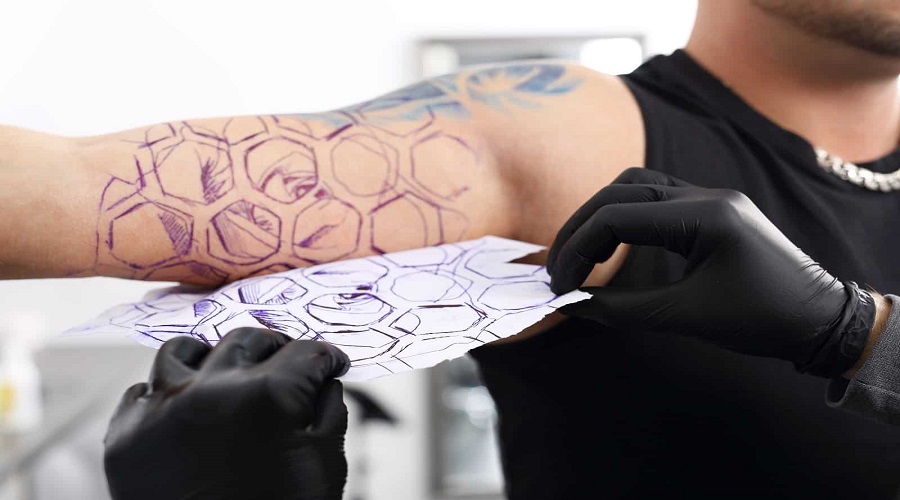
How Do You Transfer Stencils from Paper to Skin?
When it comes to body art, there are a variety of ways to create unique and beautiful designs. One popular method is to use stencils. Stencils can be made from a variety of materials, but paper is one of the most common.
So, how do you transfer stencils from paper to skin? It’s actually pretty simple! First, you’ll need to make sure your paper stencil is the right size and shape for the area you want to tattoo.
Once you have your stencil ready, apply a thin layer of petroleum jelly or baby oil over the entire design. This will help the stencil adhere to your skin.
Next, place the stencil on your skin and gently press down so that it’s nice and snug.
Once the stencil is in place, use a sharpie or other fine-tipped marker to trace around the design. The ink from the marker will help transfer the design onto your skin.
Finally, remove the stencil carefully and voila!
You should now have a perfect copy of your design on your skin that’s ready to be filled in with ink.
What Do You Use to Draw on Stencil Paper for Tattoos?
When it comes to tattoo stencils, the options for what you can use to draw them are endless. However, there are a few things that you should keep in mind when choosing what to use. The most important thing is that whatever you use is safe and non-toxic.
After all, you will be putting this directly on your skin! Here are a few of our favorite materials to use for tattoo stencils:
Pencils: Pencils are great for tattoo stencils because they’re easy to control and come in a variety of thicknesses.
We recommend using a mechanical pencil with lead that is 2mm or less in diameter. This will help ensure that your lines are precise and clean. Be sure to test your pencil on some scrap paper before using it on your skin!
Pens: Pens can also be used for tattoo stencils, but we recommend using ones with fine tips (like Sharpies) so that your lines are nice and thin. Again, be sure to test them out on scrap paper first!
Markers: Markers can work well for tattoo stencils, but just like pens, you’ll want to make sure they have fine tips.
How Do You Use Tattoo Transfer Paper Step by Step?
Tattoo transfer paper is a specialized type of paper that is used to create a temporary tattoo. It is often used as a way to test out a design before getting a permanent tattoo. Transferring a tattoo onto the skin is a simple process that only requires a few supplies.
Here are the steps for using tattoo transfer paper:
1. Begin by clean shaving the area where you want to place the tattoo. This will give you the clearest and most accurate transfer.
2. Cut out your design from the sheet of tattoo transfer paper. Make sure all edges are cut cleanly so that your design will not have any ragged lines when it is transferred onto your skin.
3. Place the tattoo face down on your skin and hold it in place with one hand while you use a wet cloth or sponge to dampen the back of the paper evenly.
4. Wait 1-2 minutes for the water to soak through the paper and loosen up the adhesive holding the design in place on the backing sheet .
5) Carefully peel away the backing sheet, making sure not to dislodge or move the position of your tattoo design .
Conclusion
Stencil paper is a great way to get professional looking tattoos at home. All you need is some tattoo ink, stencil paper, and a few other supplies and you’re good to go! Here’s a step by step guide on how to use stencil paper for tattoos:
1. First, decide on the design you want to use for your tattoo. Once you have your design, print it out onto the stencil paper.
2. Next, cut out your design from the stencil paper.
Make sure that all of the details are cut out properly so that they will show up when you apply the tattoo ink later on.
3. Once your design is cut out, place it on your skin where you want the tattoo to be located. Use a piece of clear tape to secure the stencil in place if necessary.
4. Now it’s time to apply the tattoo ink over top of your stencil. You can either do this with a brush or a sponge – whichever you prefer. Just make sure that the ink is evenly applied overtop of the entire stenciled area.