
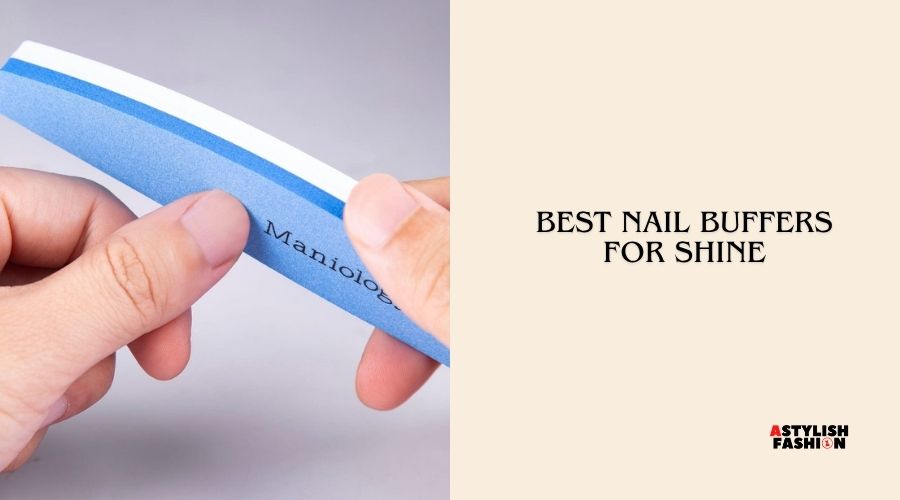
Choosing the Best Nail Buffers For Shine can feel overwhelming because so many options promise a salon-quality glow. You want nails that look healthy and smooth, but picking the wrong grit can lead to thin or damaged nail beds. This guide helps you navigate the different materials and shapes available today. We will compare top options to help you decide which tool fits your routine perfectly.
Our Picks
10 Best Nail Buffers For Shine Of 2026
1. Seacret Nail Buffer Block

Best for: People wanting a quick, chemical-free, high-gloss finish.
The Seacret Nail Buffer Block uses a 3-step system to transform dull nails into a glass-like finish. This tool is Korean-made and engineered for durability, meaning it’s designed to last for months rather than being a disposable item.
This buffer is ideal for those with a busy lifestyle who need a compact tool for their purse or desk. Because it requires no liquids or UV lamps, it’s a clean way to maintain your nails on the go. However, this may not be the right choice for someone looking for a multi-grit tool specifically for heavy-duty shaping, as its primary focus is the surface finish.
Pros
- Three-step color-coded system for ease.
- Durable, long-lasting precision-grade materials.
- Compact size fits in any bag.
Cons
- Not designed for heavy nail shaping.
2. Onsen Secret Professional Nail Buffer Block

Best for: Those recovering nails from gel or acrylic damage.
The Onsen Secret Buffer Block features a 4-sided design meant to lock in moisture while buffing. Its patented grit technology is specifically aimed at preventing nail splitting and thinning, making it a favorite for those focused on long-term nail health. It also includes extra shine pads to extend the life of the block.
It’s particularly effective for a “Nail Reboot” after removing artificial enhancements. This buffer might be overkill for someone who only wants a basic, single-step shine and doesn’t have time for a 4-step routine.
Pros
- Moisture-locking technology prevents nail dryness.
- Includes two extra replaceable shine pads.
- Designed for long-term, sustainable weekly use.
Cons
- Requires a multi-step routine for best results.
3. DRMODE Nano Glass Shiner

Best for: Users who prefer a physical, chemical-free glass finish.
The DRMODE Nano Glass Shiner is made from high-density nano glass, offering a modern alternative to traditional foam blocks. It creates a smooth, glossy shine in about one minute using physical principles rather than grit. Because it is washable, you can rinse it with running water, making it a very hygienic option.
This shiner is perfect for anyone worried about the damage caused by traditional, rough-grit files. It’s small enough to keep in your office or travel bag for quick touch-ups. Those who prefer the tactile, soft feedback of a foam buffer might find the rigid glass surface feels different during use.
Pros
- High-density nano glass is very durable.
- Easy to clean under running water.
- No need for chemical polishes or creams.
Cons
- Rigid surface lacks the soft feel of foam.
4. ForPro Professional Collection Super Quick Shine 2-Way Buffer

Best for: Professionals or frequent users needing bulk supply.
The ForPro Quick Shine Buffer is a 2-way tool that features a green 400-grit side and a white 4000-grit side. The spongy foam construction allows the abrasive material to flex, which helps in eliminating ridges without causing discomfort. These are sanitizable, making them a safe choice for those who prioritize hygiene.
These buffers come in a pack of 25, which is excellent for long-term stock or sharing with family. They’re sized at 3.5 inches, making them very easy to handle for detailed work. This may not be the best choice for a casual user who only needs one or two buffers, as the large quantity is specifically geared toward frequent use.
Pros
- Spongy foam allows for flexible, gentle buffing.
- Sanitizable and washable material.
- Convenient pack of 25 for long-term use.
Cons
- Large quantity may exceed casual home needs.
5. AhaTopia 7-Way Buffer

Best for: Beginners who want all-in-one grit variety.
The AhaTopia 7-Way Buffer provides seven different surfaces, each numbered to guide you through the process. From coarse shaping to final polishing, it covers every step of a full manicure. The use of premium EVA foam ensures that the trimming and buffing remain gentle on the natural nail plate.
This buffer is highly versatile and works on natural, gel, or acrylic nails. Its compact, all-in-one design makes it a great travel companion for those who want a complete kit in a single block. If you’re looking for a simple, one-step solution, the seven-step process might feel a bit time-consuming for daily use.
Pros
- Seven numbered sides for a complete routine.
- Versatile enough for natural and artificial nails.
- Lightweight and portable foam design.
Cons
- Multi-step process takes more time.
6. Tweezerman Nail Buffer Blocks Pack of 2 Black

Best for: Those who value ergonomic, color-coded guidance.
The Tweezerman Nail Buffer Blocks are designed with four sides that file, buff, smooth, and shine. The color-coded pads make it very easy to follow the correct order of operations, reducing the chance of mistakes. These blocks are gentle on the nails, ensuring you can achieve a perfect shine without damaging the surface.
These buffers are designed to file, buff, smooth, and shine nails. They’re simple to use and replace when the pads wear out. If you have very small nail beds, the block shape might feel slightly large, but for most, it provides excellent control.
Pros
- Clear color-coded pads for easy use.
- Gentle action protects the nail bed.
- Reliable design for shaping and shining.
Cons
- Block size might be large for some.
7. Makartt Nail Buffer Kit

Best for: Users seeking a high-gloss, long-lasting shine.
The Makartt Nail Buffer Kit uses a 400/6000 grit combination to deliver a shine that can last up to 7 days. By using a two-step process, you can quickly smooth ridges and polish nail tips. These buffers are made with high-quality EVA foam, which provides good elasticity and flexibility.
This kit is great for those who want professional-looking results at home. The mini size makes them very portable for travel or quick touch-ups. If you’re looking for a very coarse grit for heavy nail reduction, this kit’s 400-grit side is more for smoothing than aggressive shaping.
Pros
- Produces a long-lasting, high-gloss finish.
- Flexible EVA foam is gentle on nails.
- Compact and easy to grip.
Cons
- Grit is better for smoothing than shaping.
8. Tropical Shine Colossal 4-Way Blue-Pink Buffer

Best for: Someone who prefers a larger, easier-to-grip tool.
The Tropical Shine Colossal Buffer features a larger, “colossal” size that many find easier to hold and control. It’s a 4-way tool that covers everything from shaping edges to creating a final glossy luster. The steps are printed directly on the buffer, so you never have to guess which side to use.
This buffer is a durable and reusable option that provides excellent value. Its portability means you can keep it in a carry-on bag for travel. Because it’s a larger tool, it might be slightly less precise for very small fingernails compared to a smaller, more slender buffer.
Pros
- Larger size provides a better grip.
- Step-by-step instructions printed on the block.
- Very durable and easy to rinse clean.
Cons
- Large size may be less precise.
9. KADS Chamois Nail Buffer

Best for: Traditionalists who prefer natural materials.
The KADS Chamois Nail Buffer utilizes sheep leather, a traditional material known for its ability to bring out a natural luster in nails. It’s perfect for those who want to avoid synthetic foam blocks. This tool is versatile enough for use on natural nails, false nails, and even nail extensions.
This buffer is a great choice for professional salon use or personal care at home. It’s quite different from the modern foam blocks, offering a more classic approach to buffing. If you prefer a modern, all-in-one grit block, this specialized tool might not replace your standard file and buffer set.
Pros
- Made with high-quality, natural sheep leather.
- Highly versatile for various nail types.
- Ideal for both professional and home use.
Cons
- Requires a different technique than foam blocks.
10. Revlon Shape ‘N’ Buff Nail Buffer
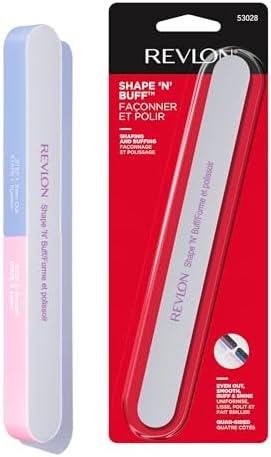
Best for: Minimalists wanting a simple, all-in-one solution.
The Revlon Shape ‘N’ Buff is an all-in-one tool that combines a filing surface with a 4-sided buffer. It’s designed to be a compact, professional-length tool that offers superior control during use. The buffing surfaces are designed to provide a long-lasting shine.
This is a perfect choice for the minimalist who wants to carry as little as possible. It’s a straightforward, reliable tool that covers all the basics of nail care in one package. It may not be as durable as some of the professional-grade blocks, but it’s very convenient for daily, light maintenance.
How to Choose the Best Nail Buffers for Shine
Understanding Grit Levels
When choosing a buffer, you must understand the numbers. A lower number, like 400, means the surface is coarser and intended for smoothing ridges or shaping edges. A higher number, like 4000 or 6000, indicates a very fine, soft surface used for polishing and creating a shine. If you have thin or brittle nails, avoid using coarse grits on the surface of the nail plate, as this can lead to further thinning. Instead, look for a buffer that offers a higher grit specifically for the final polishing step. Using the wrong grit level is the most common mistake when starting a nail care routine, as it can cause microscopic scratches rather than a smooth, reflective surface. Always start with the coarsest grit needed and work your way up to the finest one to achieve the best results without over-buffing your natural nail.
Material Choice
Chamois buffers are a more traditional option that uses leather to buff the nail, providing a natural, subtle shine.
Ease of Use
The best buffer is one you’ll actually use regularly. Look for tools that have the steps clearly printed on the side or that use color-coding to guide you. This prevents confusion and helps you avoid skipping steps or using the wrong side on your nails. If you’re a beginner, a tool with clear, numbered instructions is invaluable. Consider the size and shape as well; a “colossal” or larger buffer might be easier to grip if you have larger hands or difficulty with fine motor skills, while a smaller, compact block is better for travel and quick touch-ups. Ergonomics matter because consistent use is the key to maintaining a healthy shine. Choose a tool that fits comfortably in your hand so you can maintain steady pressure and consistent movement across the nail surface for the most uniform results.
Durability and Maintenance
Others are built to last for months, featuring high-grade materials that maintain their effectiveness through repeated use.
Final Selection Strategy
To narrow down your choice, start by identifying your primary goal. Do you need to repair damage from gels, or do you just want a quick, natural shine? If you’re recovering from damage, prioritize a buffer that emphasizes moisture and gentle grit. If you’re looking for a quick, daily shine, a glass shiner or a simple 3-way foam block might be your best bet. Consider your lifestyle; if you travel often, pick a compact, durable block. If you’re at home, a larger, more comprehensive kit might be better. By matching the tool’s features to your specific nail needs and how you plan to use it, you can easily find the right option. Don’t feel pressured to buy the most complex kit if you only need a basic shine; simple, high-quality tools often provide the most consistent and effective results for most users.
Common Mistakes When Using Nail Buffers
Over-Buffing the Nail Surface
The most frequent mistake is buffing too often or with too much pressure. While it’s tempting to keep buffing until you achieve a mirror-like finish, doing this too frequently thins the nail plate. Your nails need their natural thickness to remain strong and flexible. Over-buffing can lead to sensitivity, splitting, and brittleness. A good rule of thumb is to only buff the surface of your nails every few weeks, rather than every day. Use light, even pressure, and stop as soon as you achieve the desired shine. If you find your nails feeling thin or sensitive to heat or cold, you’re likely buffing too aggressively. Always prioritize the health of your nail bed over the immediate gloss. A healthy, natural shine should be a byproduct of well-maintained, smooth nails, not the result of wearing down the nail surface.
Using Coarse Grit on Thin Nails
Many users grab the first buffer they see without checking the grit level. Using a coarse-grit side intended for shaping edges on the delicate surface of your nail is a recipe for damage. Coarse grits are designed to remove material, which is exactly what you want to avoid on the top of your nail. Always check the grit number before you start. If a side feels rough or grainy, it’s for shaping or smoothing edges only. Use the finest grit available for the final polish. If you’re unsure, test the buffer on a piece of paper or just feel it with your thumb. If it feels scratchy, don’t use it on the flat part of your nail. Using the wrong side is a common cause of nail ridges and surface damage that can take weeks to grow out.
Ignoring Hygiene
It’s easy to forget that your nail buffer collects dead skin, nail dust, and oils from your fingers. Using a dirty buffer can lead to the buildup of bacteria, which can then be transferred back to your nails. If your buffer is washable, make sure to clean it regularly with mild soap and water. If it isn’t washable, replace it as soon as it shows signs of wear or becomes discolored. Never share your personal buffers with others, as this is a common way to spread germs. If you use a buffer in a professional setting, ensure it’s sanitized between uses. Keeping your tools clean is just as important as the quality of the buffer itself. A clean tool ensures a clean, healthy shine and protects your nails from unnecessary irritation or potential infections.
Buying Without Considering Your Needs
Another common mistake is purchasing a complex, multi-step system when you only need a simple, one-step solution, or vice versa. If you’re a minimalist, a 7-way buffer might just end up cluttering your drawer. Conversely, if you want a professional-level finish, a simple 2-way buffer might leave you wanting more. Take a moment to think about your current routine. Are you willing to spend five minutes on a multi-step process, or do you need something that works in under a minute? Choosing a tool that fits your habits is essential for long-term consistency. Don’t be swayed by marketing claims that suggest a specific tool is the only way to get a good result. The best tool is the one that you find easy and enjoyable to use. If the process feels like a chore, you’re less likely to stick with it.
Neglecting Aftercare
Buffing is only one part of a healthy nail routine, requiring just a brief moment of your time to achieve a smooth finish. After buffing, your nails are clean and smooth, which is the perfect time to apply a nourishing nail oil or hand cream. Buffing can sometimes leave the nail feeling slightly dry, so replenishing that moisture is key. Many people stop at the shine and forget to hydrate. Applying a high-quality cuticle oil helps maintain the flexibility of the nail and prevents the brittleness that can sometimes occur if you buff too often. Think of buffing as the preparation step and hydration as the maintenance step. By combining these two, you ensure that your nails not only look shiny but also feel strong and healthy. Neglecting this final step is a missed opportunity to provide the care your nails need to stay in top condition between sessions.
FAQ
How often should I buff my nails to keep them shiny without causing damage?
Generally, you should only buff the surface of your nails once every two to four weeks using a versatile tool designed with multiple abrasive surfaces. Shaping the edges can be done more often, but the flat surface of the nail needs time to regrow its natural protective layers.
Can I use these buffers on artificial nails like acrylics or gels?
Many foam blocks are versatile enough for artificial nails, but always check the product description first. Glass shiners and chamois buffers are usually best suited for natural nails, while 7-way blocks are often designed to handle both types.
Why do my nails feel thin after buffing?
Nails feel thin when too much of the top layer has been removed. This usually happens if you use a grit that’s too coarse on the nail surface or if you buff too frequently. Always use the finest grit available for the final polish and use light pressure.
How do I clean my nail buffer?
If your buffer is washable, rinse it under running water with a little mild soap and let it air dry completely before storing. If it isn’t washable, avoid getting it wet and replace it when it becomes worn or dirty to maintain good hygiene.
Do I need to apply polish after buffing?
Not at all. The goal of these buffers is to achieve a natural, glass-like shine without the need for chemical polishes. Buffing creates a smooth surface that reflects light naturally, which is why it’s a popular alternative to clear coats.
Conclusion
The right nail buffer can give your nails a healthy, professional glow without the need for chemicals. By selecting a tool that matches your routine—whether it’s a simple foam block or a modern glass shiner—you can maintain beautiful nails with minimal effort. Focus on using the correct grit and maintaining your tools to keep your nails strong and shiny for the long term.